All Modular Brands
 All Patch Cables
 Synthesizers
 Controllers
 Drum Machines
 Sequencers
 Samplers
 Soundmakers
 DIY
DIY
 Effects
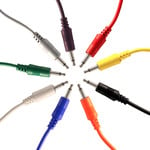 Cables
 Audio/MIDI
 Video
Video
 Music/Media/Gifts
 Accessories
 Used
Used
 Vintage
 DEALS
DEALS
 Modular
 Synthesizers
 Controllers
 Drum Machines
 Sequencers
 Samplers
 Soundmakers
 DIY
DIY
 Effects
 Cables
 Audio/MIDI
 Video
Video
 Music/Media/Gifts
 Accessories
 Used
Used
 Vintage
 DEALS
DEALS

Basic Synth 7: Effects
Once we’ve created our synth voice and everything is connected and functioning properly, there’s a final ingredient that can add movement and space to the sound - a topic that anyone coming from the guitar and bass world will be very familiar with - effects!
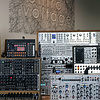
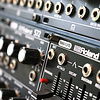
Many high-end keyboard synthesizers have effects built into their architecture, but in the modular realm, we often add them to the system on a module-by-module basis.
I’ve broken down the most common into three main categories: Harmonic Effects, Dynamic Effects, and Time-Based Effects. Lets dig in!
Harmonic Effects: change the harmonic overtones of the waveform.
Filters: Back to our Basic Synth 2 knowledge, we know that filters of all types change the harmonic makeup of a sound by controlling the cutoff frequency and the resonance of the filter. These can be used to cut low frequencies, high frequencies, or mid frequencies anywhere in the sound spectrum.
Soft Clipping Distortion: saturates the amplitude of an audio signal over a smooth curve. When signal amplitude reaches a threshold, the signal is clipped, or flattened at the top and bottom areas of the waveform. This distortion is gentle and can fall in the category of overdrive or gain.
Hard Clipping Distortion: saturates the amplitude of an audio signal over a hard square edge curve. When signal amplitude reaches a threshold, the signal is clipped, or flattened at the top and bottom areas of the waveform. This distortion is aggressive and because a hard square edge curve is used, the resulting sound contains odd-numbered harmonics.
Both soft and hard clipping distortion can be achieved by overloading filters, VCAs, mixers, etc.
Wavefolders: Unlike traditional distortion effects where signal passing an amplitude threshold is clipped, wavefolding inverts signal amplitude when it passes a threshold. This folding can occur multiple times resulting in dynamic control over rich harmonic spectra.
Here are some wavefolders to check out:
- Antimatter Audio Crossfold
- BASTL/Casper Electronics Waver
- Instruo athru
- Tiptop Audio Fold Processor
- WMD/SSF Ultrafold
Waveshapers: Going back to our Basic Synth 1 knowledge, we know that many synthesizers generate their waveforms from a single oscillator core (usually triangle or saw core). In order to create other waveforms from the core waveforms (a triangle to a sine, for example), the core waveforms must be processed through different waveshaper circuits. These waveshaper circuits are often given a front panel control for dynamic waveshaping functionality.
There aren’t many single waveshaper modules, but here’s a great one:
Dynamic Effects: alter the dynamic range of a sound. They can be used in both a subtle or aggressive manner. What’s interesting is that both dynamic effects can be achieved by the same module.
Compression: is used to truncate the dynamic range of a signal. If a signal reaches a threshold level, it’s level is proportionally reduced by a ratio amount. This “squashes” the dynamic range of the sound. Make-up gain can then be applied to the dynamic range. These two steps essentially make the loudest parts quieter and the quietest parts louder. There’s always an attack and release time to let the compressor know when to kick in. Here’s a typical scenario - With a set 4:1 ratio, a signal that surpasses the threshold by 4dB outputs only 1dB of signal. Compression really has to be played with to understand its purpose and function. It’s a deep subject, but worth touching upon here.
Limiting: an effect often used to make everything louder without surpassing the ceiling! Limiters are really just compressors with a higher ratio (often 10:1).
Here are some awesome compressor/limiter modules:
Time-Based Effects: All time-based effects are basically a simple feedback delay line. The only differences between effects like delay, chorus, and flange is the specific range in delay time and any added modulation to the delay time parameter.
What is a feedback delay line, you may ask? Here’s an easy breakdown.
Basically, a signal goes into a delay line and then outputs from the delay line to the speaker. Additionally, that output signal is also split and fed back into the delay line’s input, creating a feedback loop. If we ensure that the original signal is always louder than the processed signal, then the sound gets quieter with every delayed repeat.
Echo: Echo effects have time ranges of 100ms - several seconds.
An echo effect has three basic parameters:
- Time - The time in which echos occur. Think about it in terms of shouting into a cave - if the cave is small, echos will happen very quickly, meaning there’s a short delay time. If the cave is large, echos will have more time between each successive repeat, meaning there’s a long delay time.
- Feedback - Feedback is the amount (or amplitude) of signal that is being fed back into the delay line (often called Repeats). This determines how many echos will occur.
- Mix - Our initial sound is the dry signal. Our echoed sound is the wet signal. We can mix between these two signals to create different balances of dry and wet signal.
Slapback: very popular in early 1960s pop music.
This effect has a delay time range of 75ms-100ms, and only delays one time. As its name suggests, it slaps back a repeat directly after the initial sound.
The parameters of a slapback delay effect have the same function as those of a traditional echo.
Doubling: is a simple delay trick to make things sound thicker without proper chorusing or frequency beating. This effect has a delay time range of 40ms-70ms, and only repeats one time. The delayed signal should only be about half the amplitude of the original signal.
The parameters of a doubling delay effect have the same function as those of a traditional echo.
Chorus: is another time-based delay effect, that is often used for fattening and detuning sounds. It’s delay time is so fast, that we perceive it as more of a tone control than an delay control. Chorus effects have a delay time range of 20ms - 40ms
Again there are the same three basic parameters:
- Time - Often called Rate or Speed in the chorus world, the time control sets the delay time.
- Feedback - Often called depth in the chorus world, the feedback is the amount (or amplitude) of signal that is being fed back into the delay line. This determines the timbre of the sound.
- Mix - Our initial sound is the dry signal. Our chorused sound is the wet signal. We can mix between these two signals to create different balances of dry and wet versions of the same sound.
- The difference here is that there’s always a LFO modulating the delay time that creates the detuning oscillations.
Pro tip: Chorusing can also be done with pulse width modulation of a pulse waveform. The modulation of the +/- ratios of the pulse wave create a Doppler effect and will produce detuning and chorusing effects. Additionally you can get frequency beating (similar to chorusing) by detuning unison oscillators.
Flange: Flanging was originally done by applying finger pressure to a recorded tape in a reel-to-reel tape machine, but we can do it easily with digital delay effects. Flanging has a delay time range of 1ms-15ms.
Like chorusing, flanging has the same basic features:
- Time - Often called Rate or Speed in the flange world, the time control sets the delay time.
- Feedback - Often called depth in the chorus world, the feedback is the amount (or amplitude) of signal that is being fed back into the delay line. This determines the timbre of the sound.
- Mix - Our initial sound is the dry signal. Our flanged sound is the wet signal. We can mix between these two signals to create different balances of dry and wet versions of the same sound.
- Again, there’s always a LFO modulating the delay time that creates the effect oscillations.
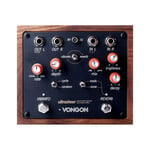
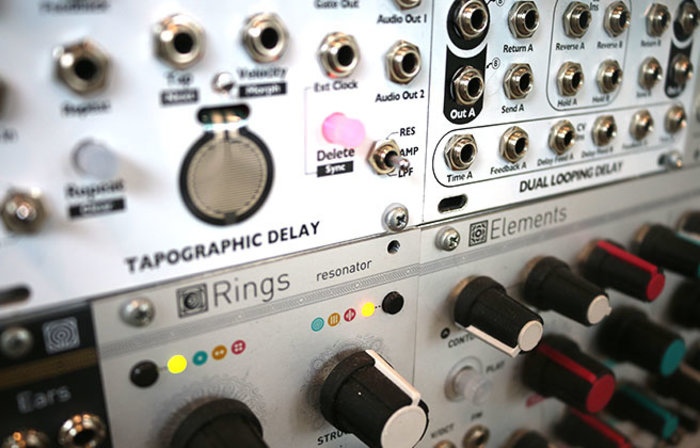
There are some wonderful multi-FX modules out there that cover a lot of these basis:
Comb Filtering: is very similar to flanging but without the added modulation.
Contrary to its name, comb filters are just delay lines with a very fast delay time.
- Time - Often called Frequency for comb filters, is the time control of the delay time and sets the frequency of the filtering effect.
- Feedback - Often called resonance for comb filters, is the feedback amount control (or amplitude) of signal that is being fed back into the delay line. This determines how resonant the comb filter is.
- Mix - Our initial sound is the dry signal. Our comb filtered sound is the wet signal. We can mix between these two signals to create different balances of dry and wet versions of the same sound.
Here are some great comb filter modules:
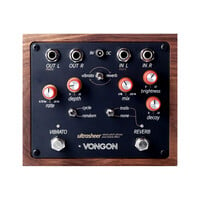
Reverb: Quite simply, reverb is what gives a sound its lushness and a sense of space. Traditionally, reverb is a product of the room in which the sound occurs. A copy of the signal could also be run through a resonating metal plate, or sent through a metallic spring. A lot of guitar pedals have settings for digital room, plate, and spring emulations. Some semi-modular synthesizers like the ARP 2600 or Moog Grandmother, have a built-in analog spring reverb tank. There are also modules like the Intellijel Springray II that allow for spring reverbs to exist in the eurorack modular realm.
Reverb is a much deeper effect and can be implemented many different ways. That being said, it's still measured in time and has feedback and mix controls.
Series Vs. Parallel:
There are two different ways to include effects within a system or sound. If we return to the guitar pedal board analogy that we so often refer to, we remember that the guitar can be plugged into multiple effect pedals before reaching the amplifier/speaker. Each effect will have its own mix parameter to control the ratio of dry signal to wet signal. This simple output-to-input recipe is what’s known as in-series processing. This is great if you’re only dealing with one sound, but what do you do when you want multiple sounds to be processed by the same effect while keeping each sound on its own channel? Parallel processing.
Running effects parallel to the dry signal is only achievable with a mixer (outboard or modular) that has a dedicated send and return path. What’s great about this method is that multiple signals can be sent to the same effects simultaneously. In this scenario, all dry output signals are routed directly to individual channels of a mixer. The send output on the mixer is then connected to the input of an effect. The mix parameter of the effect is set to its maximum level (fully wet). The dedicated send knob per channel controls the amplitude of the dry signal routed to the send output. The output of the effect is then connected to the return input of the mixer, completing the signal path.
For instance, imagine you want several drum sounds to be on individual mixer channels, but to all be affected by the same compressor. Simply connect the kick drum to channel 1 of the mixer, snare drum to channel 2, hi hats to channel 3, and crash cymbal to channel 4. Then connect the send output of the mixer to the input of the compressor. Finally, connect the output of the compressor to the return input of the mixer. Play with the send parameters on a per channel basis to decide how much of each drum/cymbal gets sent to the compressor. Parallel compression is a great way to get punchy drums that stand out in the mix.
Here are some modules that include send and return functionality:
- 4ms Listen In/Out
- ALM Busy Circuits S.B.G.
- Intellijel Audio Interface II
- WMD Performance Mixer
- Toppobrillo Stereomix 2
Conclusion:
That’s it, with the awareness of oscillators, filters, VCAs, modulation sources, sequencers & keyboards, utilities, and now effects, there is nothing to stop you from mastering any synthesizer that you come across. Now the journey begins as you create and curate the ultimate instrument. Good luck!
Thanks again for checking out our blog and learning modular synthesis with us!
Feel free to comment with any questions, ideas, or opinions!